Create Project Templates
When a new project is created, it uses a “template” as the blueprint for that project. This blueprint includes the following details for the project:
-
Project Roles – the list of roles a project member can be assigned for the project.
-
Document Categories – The categories documents can be placed in.
-
Document Statuses – The list of statuses you can assign your documents to match your workflow
-
Submittal Statuses - The list of statuses you can assign your submittals to match your workflow (This is only for Pro members)
When you create your first project, we create a basic template using the document categories you enter during the project setup. We also provide a default template that CM Fusion created geared towards commercial projects that you can use. In most cases, it will be beneficial if you create a custom template that fits your specific project requirements.
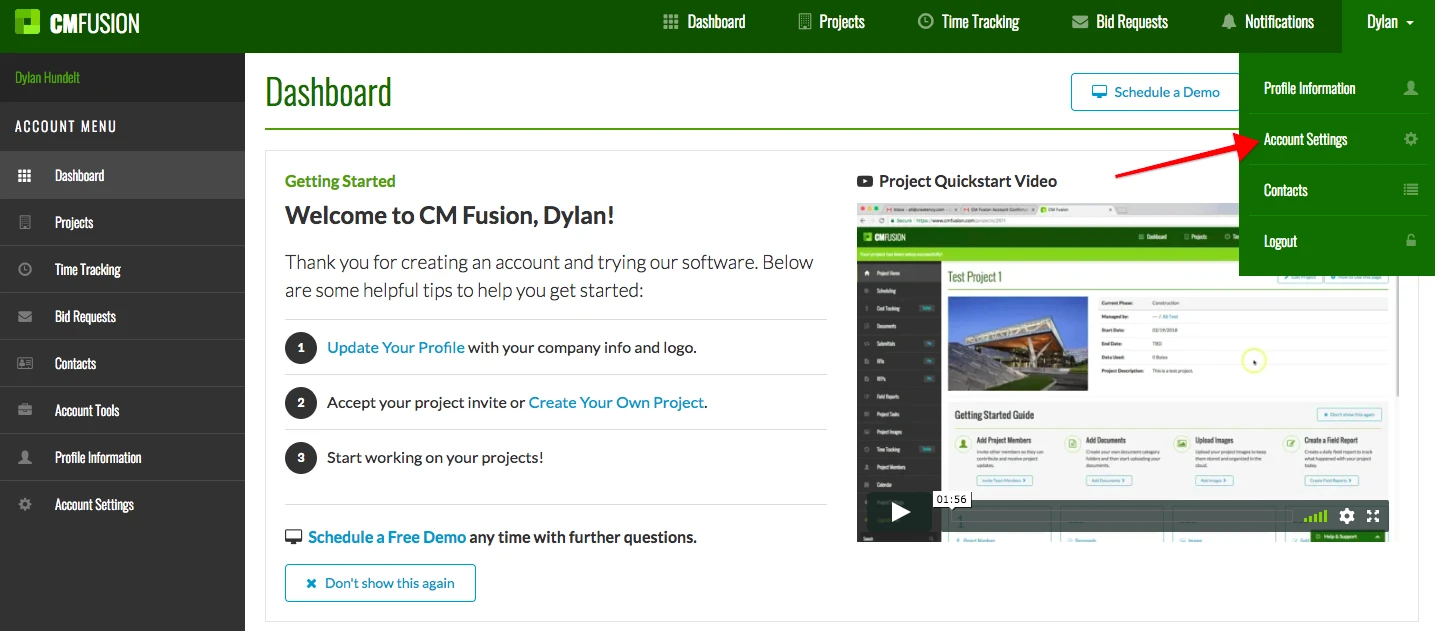
1. Start by clicking the Account Settings tab in the drop down list under your name in the top right corner.
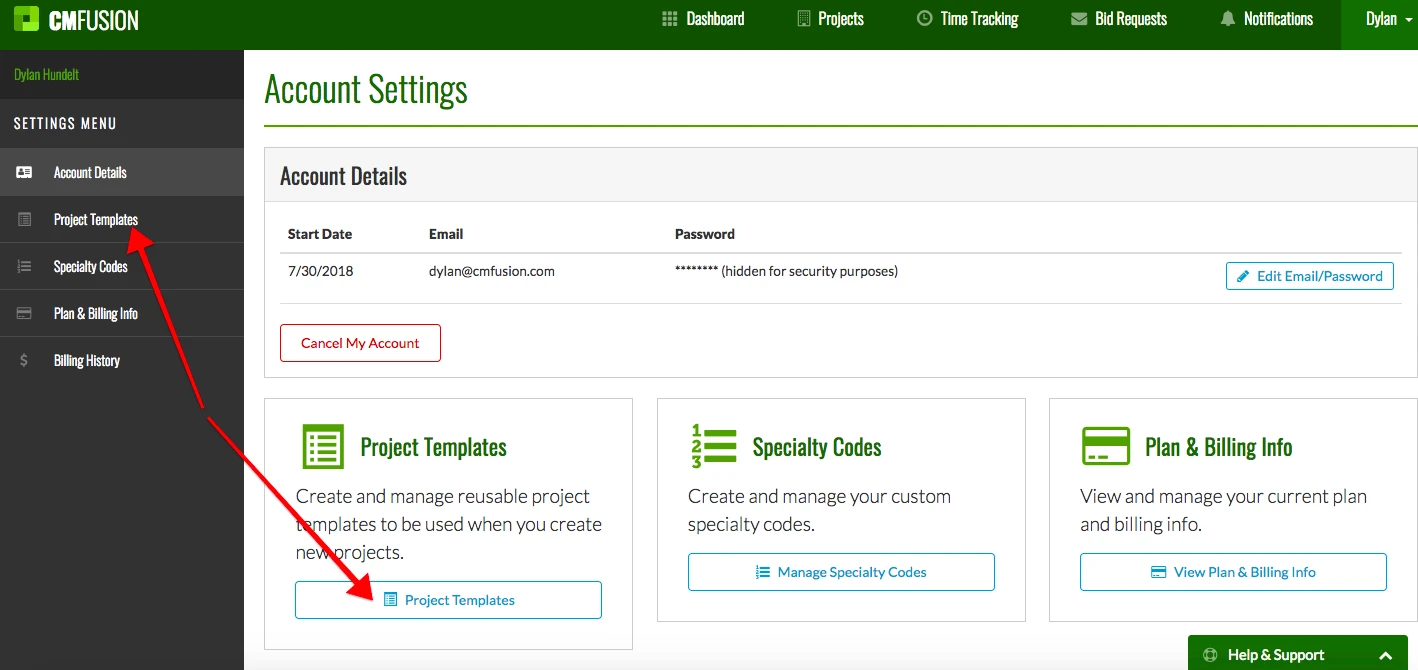
2. Next click the Project Templates tab on the left margin or the blue outlined box named Project Templates.
3. A list of your project templates will appear if you have any. If you have already created a project, a template was created for you. To view/edit a project template, click the View button next to that project. Go to down to number 6 on this page for instructions on how to edit your template. To delete a template, click the red trash can next to that project.

4. To add a new template, click the blue New Project Template button in the top right.

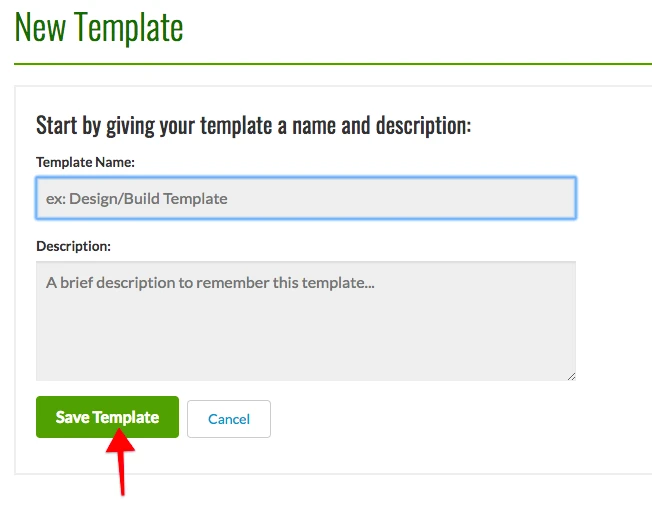
5. Enter the template name and description in the corresponding boxes. Click the Save Template button at the bottom when you are finished.
6. On this page, you can control your Project Roles, Document Categories, and Document Statuses. For Pro members, you can also control your Submittal Statuses. Your template will automatically save after each edit on this page.
Project Roles
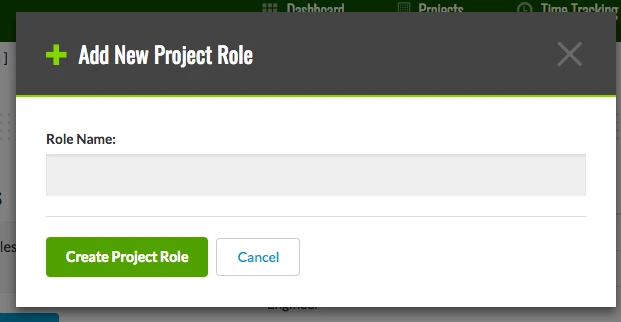
Project member roles are used to define the users on your projects. To add a new project role, click the blue Add New Project Role button under Project Roles.
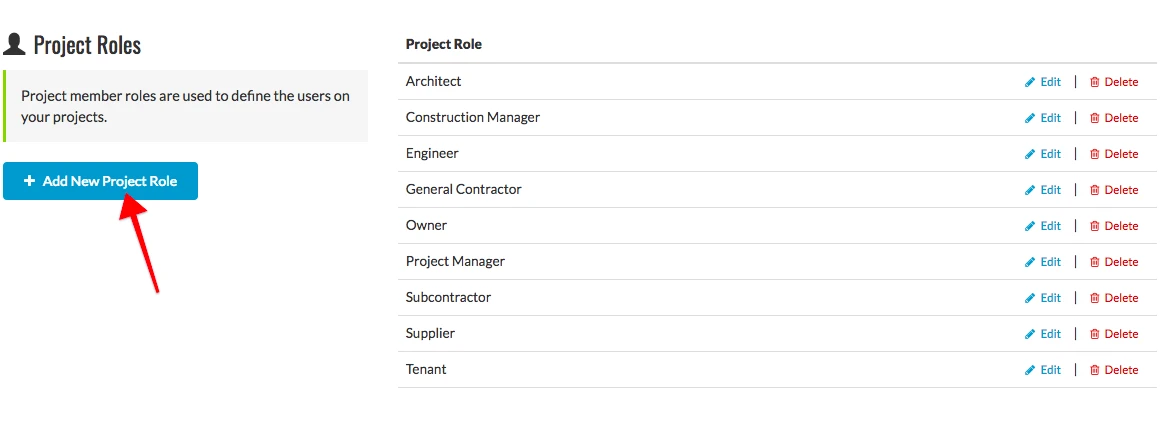
Enter in the project role name into the grey box and click Create Project Role when you are finished.
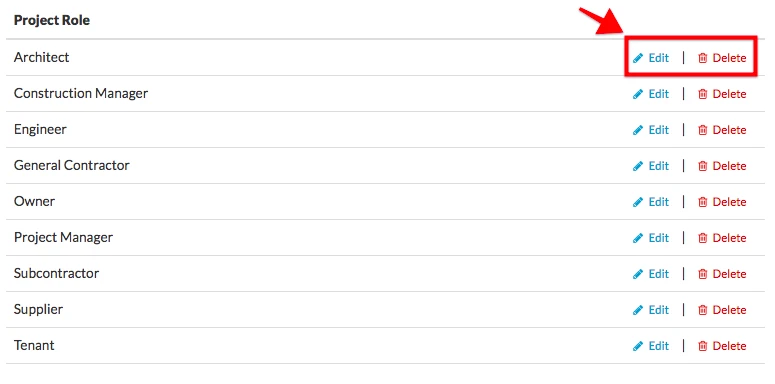
You may edit or delate a role by selecting the Edit or Delete button next to each role.
Document Categories
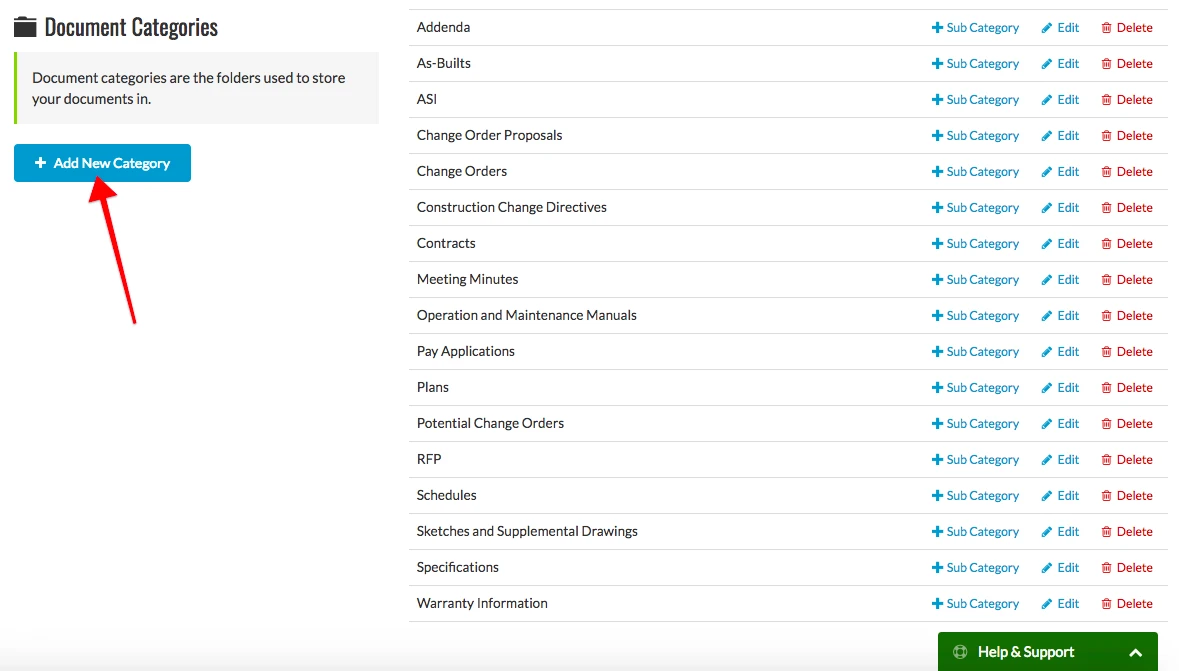
Document categories are the folders used to store your documents in. To add a new document category, click the Add New Category button.
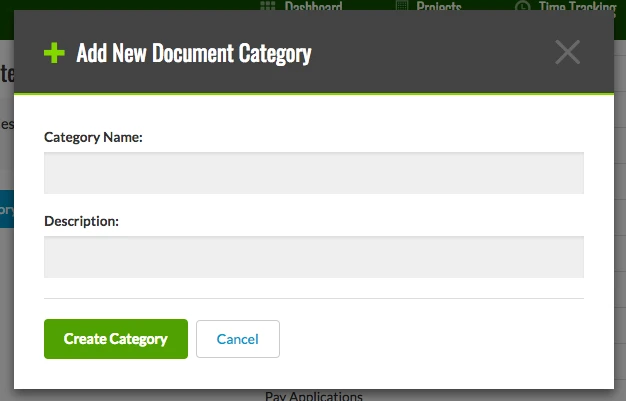
Enter the category name and description in the corresponding boxes. After you are finished, click Create Category.
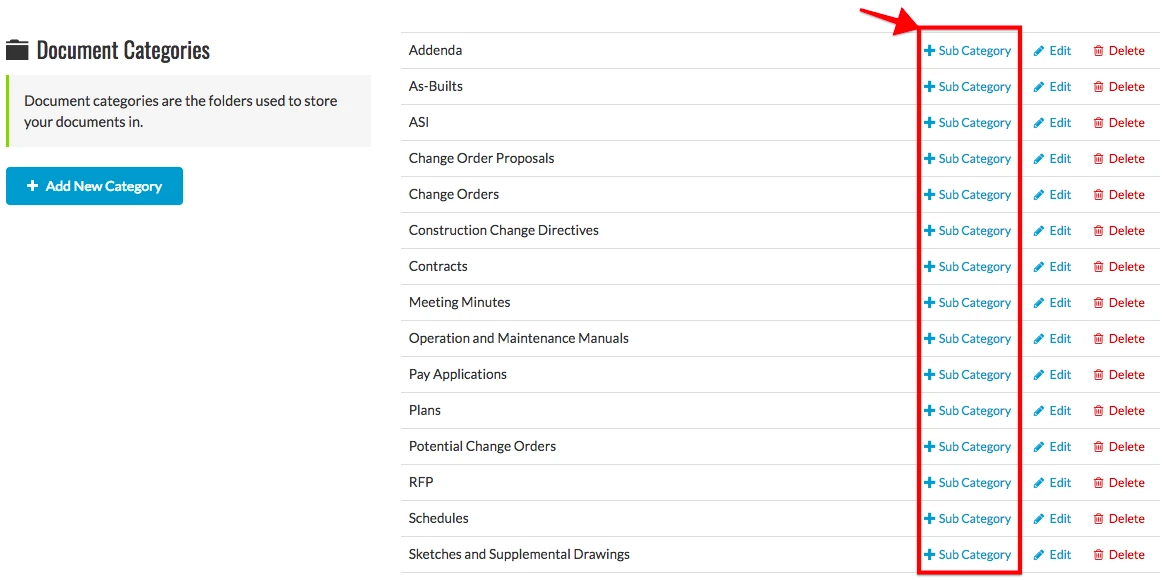
To create a document category inside another document category, click on the Sub Category button next to the category to create a sub category in it.
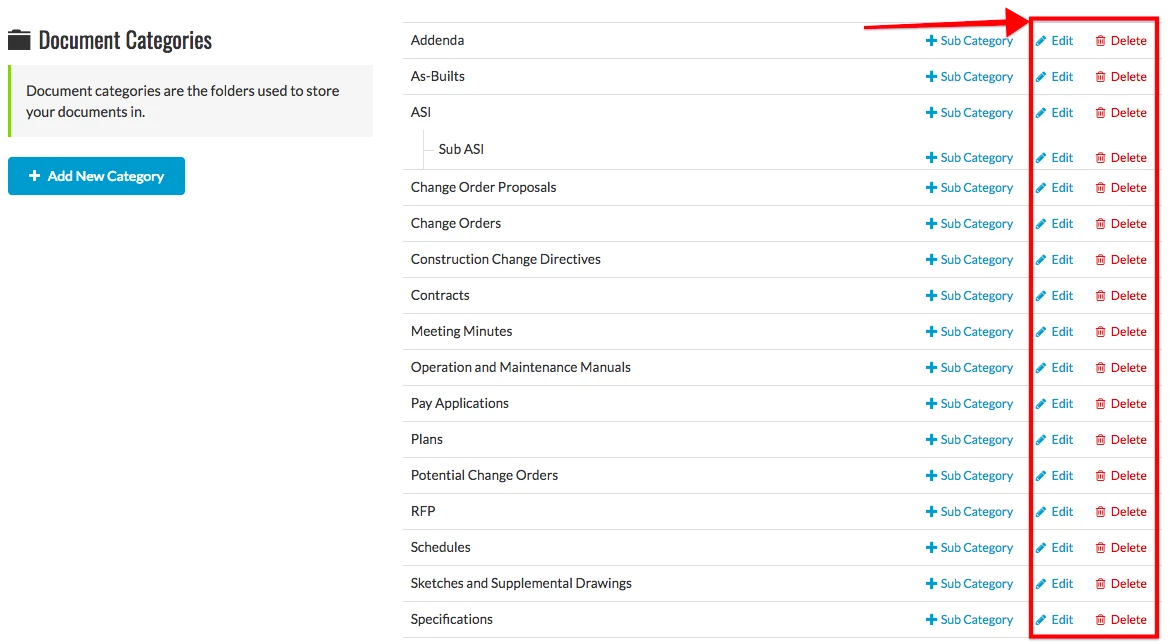
You may edit or delete a category by selecting the Edit or Delete button next to that category.
Document Statuses
Document statuses are used when changing/updating the statuses of your documents. To add a new document status, click the Add New Document Status.

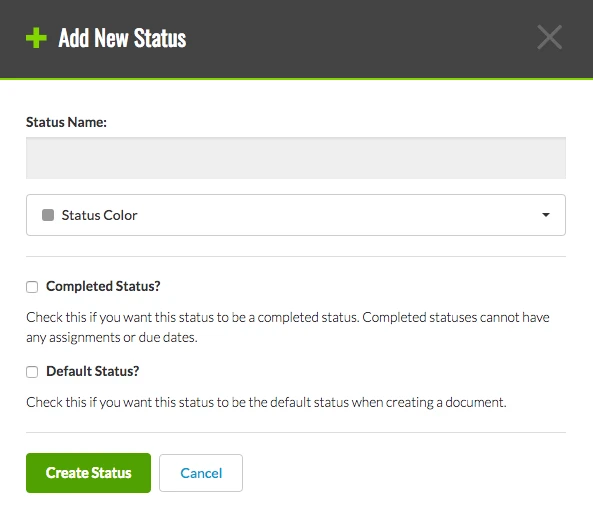
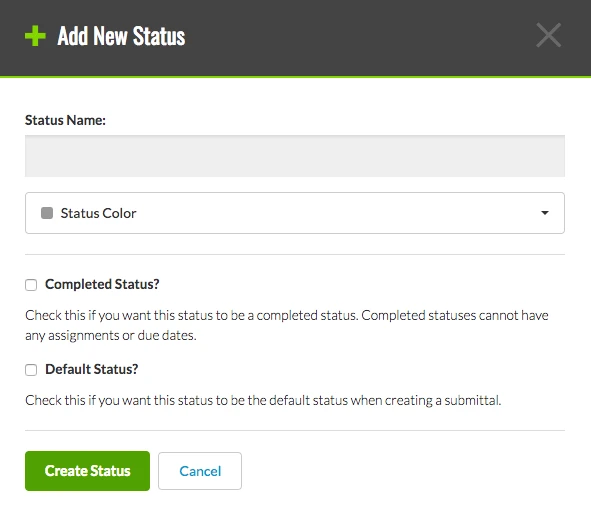
Enter the status's name in the top box. To select the status color, click the drop down arrow in the Status Color box and choose which color you want. You can also make the status a completed status and/or a default status by clicking the boxes next them. A completed status cannot have any assignment or due dates. A default status will be the status for a newly created document, unless you specify otherwise. Click Create Status when you are finished making all your choices.
You can edit or delete a document status by selecting the Edit or Delete button next to that status.

Submittal Statuses
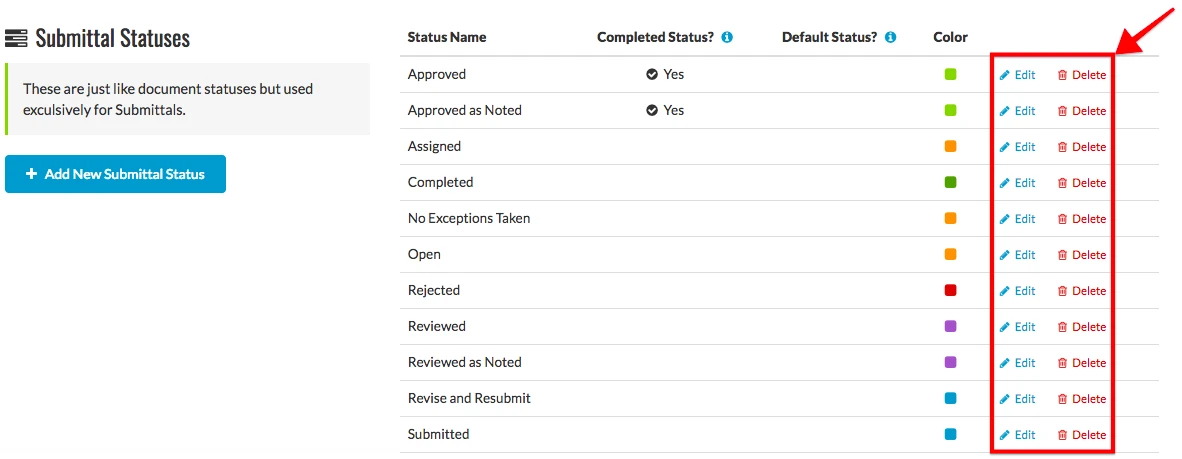
These are just like document statuses but used exclusively for Submittals. To create a new submittal status, click the Add New Submittal Status button.
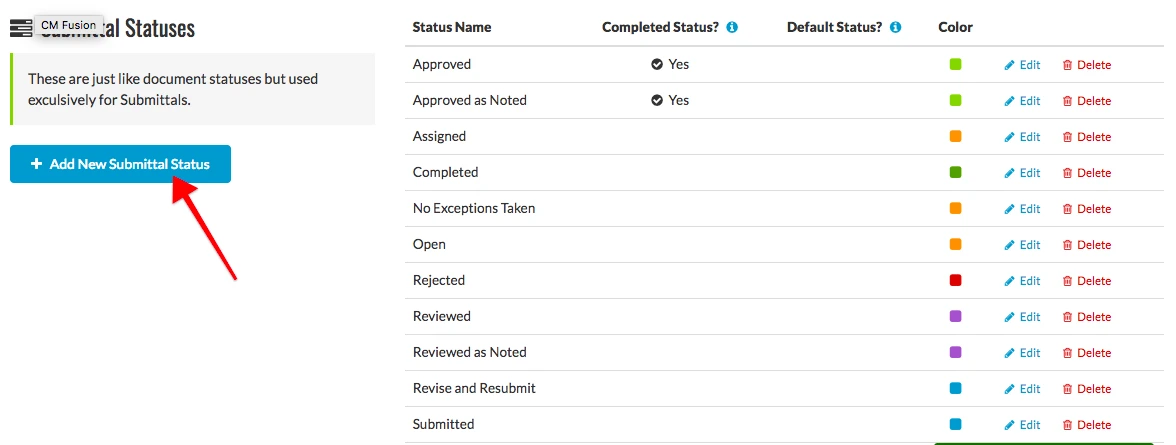
This has the same layout as creating a document status. Enter the status's name in the top box. To select the status color, click the drop down arrow in the Status Color box and choose which color you want. You can also make the status a completed status and/or a default status by clicking the boxes next them. A completed status cannot have any assignment or due dates. A default status will be the status for a newly created document, unless you specify otherwise. Click Create Status when you are finished making all your choices.
You can edit or a delete a status by click the Edit or Delete buttons next to that status.
Try CM Fusion, risk free for 30 Days – Your first project is FREE!
If you are trying to figure out where to look now, our company CM Fusion offers a free version of Construction Project Management Software. Not to mention, our customers brag about it’s ease of use, so you should be able to sign up and start managing your projects in minutes.