Create a Project Image
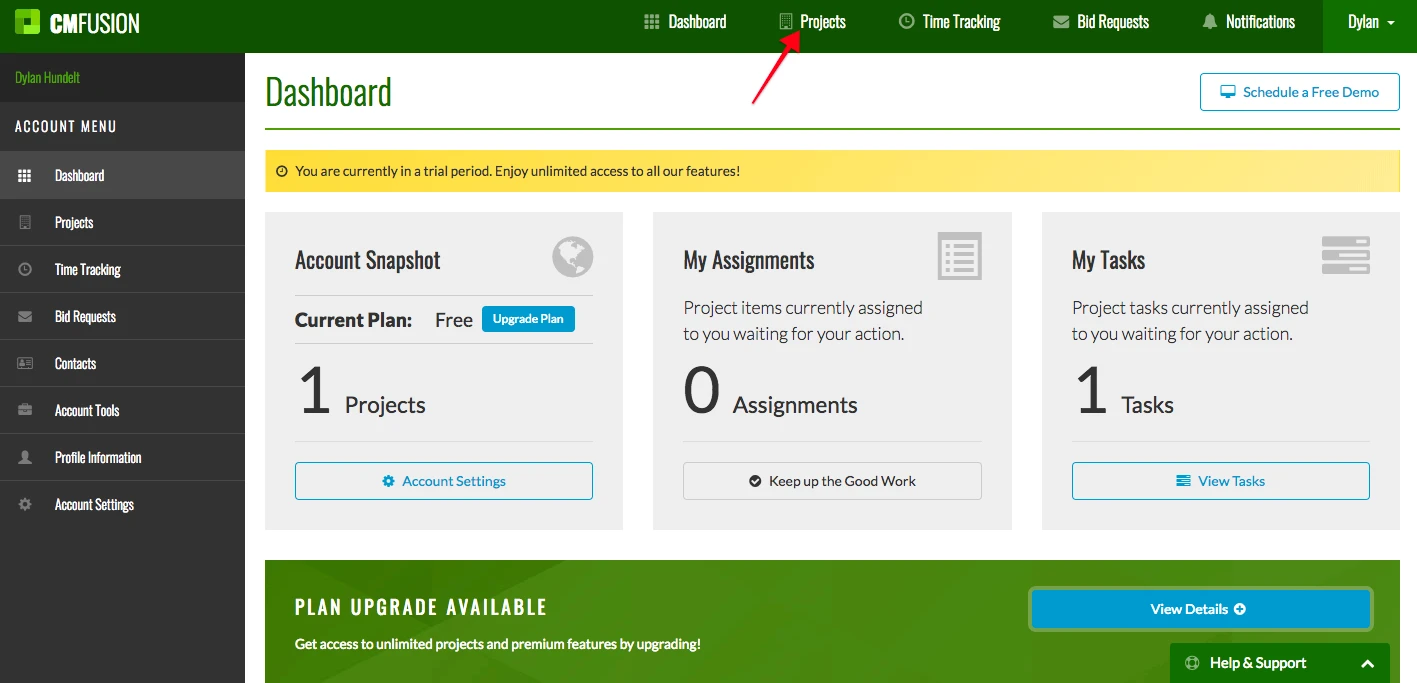
1. Let's start by going to the Projects tab in the top menu.
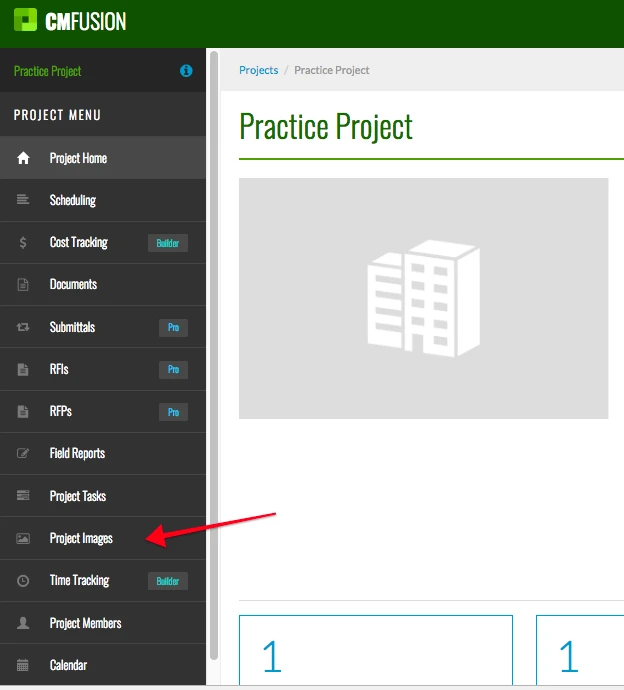
2. Then select which one of your projects you want to add an image to.
3. Next go to the Project Images tab on the left side menu.
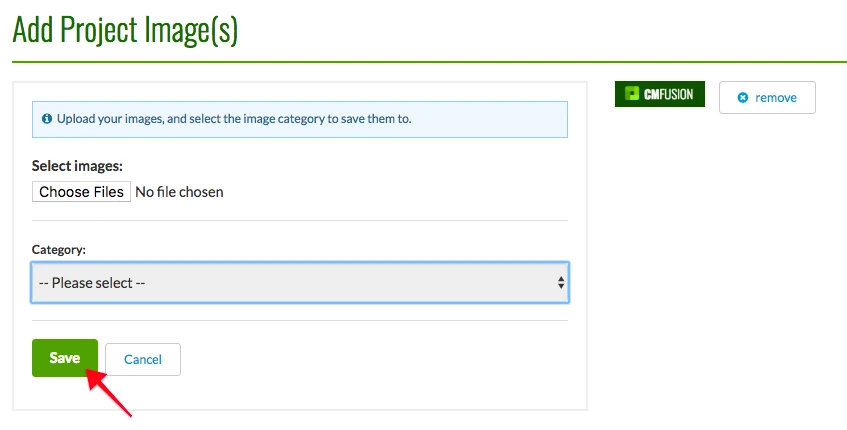
4. To create a new project image, click the Add Project Image(s) button towards the top right of the page.

5. Click Choose Files to attach all the images you want. Then go to the category bar to select which image category you want to add the images to. To create image categories, go to step 6.

A list of your images will appear on the right. Once you have chosen the images, a save button will appear. Click the Save button when you are ready to upload the images.
6. You can also create image categories. Do the first three steps on this page the same, but in step 4, click Image Categories instead.

7. Then click Add Category.

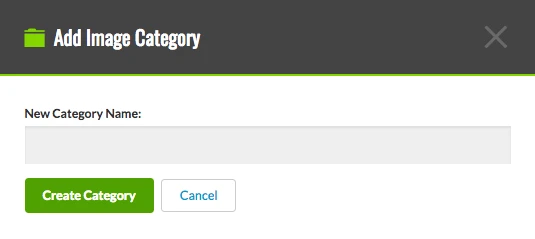
8. The following box appears. Fill out the category name, then click Create Category when you finished.
Try CM Fusion, risk free for 30 Days – Your first project is FREE!
If you are trying to figure out where to look now, our company CM Fusion offers a free version of Construction Project Management Software. Not to mention, our customers brag about it’s ease of use, so you should be able to sign up and start managing your projects in minutes.